Guild Update
COVID and Guild Playtest Meetings
Currently we are allowing playtest facilitators for each location to determine if meetings will be held, as long as they fall within state guidelines. Updates on the status of these meetings will be announced via our BGDG of Utah’s Facebook Group. The Layton and Lehi (used to be Pleasant Grove… see below) groups seems to be meeting with some regularity. The Salt Lake group is checking in with Demolition Games at this time.
Meeting Location Changing!
Blackfyre is moving to Lehi game grid Game Grid Lehi, 400 S, Millpond Dr #F, Lehi, UT 84043 1st and 3rd Tues.
Discord and the Guild
The BGDG of Utah’s Discord is a great way to get to know those in the guild and discuss all things game design! If you’ve not joined yet, we’d love to have you come and participate with us!
BGDG of Utah Social Media
We have an active Twitter and Instagram account now! Please follow and start using #bgdgofutah in your game design related posts and they will be liked, retweeted etc!
Upcoming/Current Events
SaltCON End of Summer is back!

SaltCON End of Summer will be taking place in just a few weeks! There are several games in prototype form from guild members that are listed in the events schedule so if you are attending then take time to sign up and play some of those! It’ll be great to see some of you there in person!
There’s a lot to update everyone on regarding ProtoCON! There are now two types of events under the name ProtoCON. The first is the main event, which will be taking place in person in January of 2022. The other was previously known as Protosynthesis and will now be known as ProtoCON Online! We will have the logo updated for both events and more information will follow.
ProtoCON Online
The next ProtoCON Online will take place on August 28th and will run all day! We held our last Protosynthesis in February of this year and this time we are hoping to have more games and more playtesters than before!
If you would like to participate as a Game Designer then please complete the submission form below! Submissions will be available until the event begins. Though you’ll get more exposure and have more options for your preferred time slot if you sign up early.
If you are interested in participating as a playtester then please complete the form below. IMPORTANT: if you are submitting a game as a designer then you do not need to fill out the playtester form as you will already be expected to be a playtester (it’s just common courtesy).
ProtoCON 2022
We are currently preparing for ProtoCON 2022! This will take place in January of 2022 and will be an in person board/card game prototype event! Last year was so much fun and it was sad that we had to cancel plans for 2021. Please stay tuned for more information on ProtoCON 2022!
Current Design Contests
This seems to be the most board game design contests we’ve seen in quite some time! There’s some great opportunities here! Take a look!
Roll and Write Contest (07/16/21 BGG)
World Original Design Contest of Board Game (07/18/21 YOKA games)
Korea Board Games 2021 Design Contest (07/30/21 Korea Games)
XYZ Quarks Design Challenge (07/31/21 XYZ Games)
Alley Cat Games Cooperative Game Competition (07/31/21 Alley Cat Games)
2021 Solitaire Print and Play Game Design Contest (08/23/21 BGG)
Bad Comet Co-op Design Competition (08/31/21 Bad Comet Games)
Small Box Challenge (09/30/21 The Game Crafter)
War Game Print and Play Design Contest (10/01/21 BGG)
Guild Related Videos and Games
Oros
Guild member Brandt Brinkerhoff’s game Oros will be launching on Kickstarter next week! Feel free to check out the KS Preview page as well as the official Oros Website! Brant posted a recent video about building a KS campaign, since he’s been working on that! Below is some great info!
Now or Never
Ryan Laukat recently published a new game in his Arzium series (which includes games like Above and Below as well as Near and Far). This new game is called Now or Never. Richard Ham from Rahdo Runs Through demos the game in the video below. Unlike Ryan’s other games, this one was not crowdfunded and instead can be purchased directly from his web store.
Board Game Community Podcast
Riley has done such a great job with this new podcast! There are quite a few episodes which could be featured here since the last newsletter. Go ahead and subscribe and start listening!
The Board Game Workshop Podcast
Game Design Highlights by Justin Giboney
Creating a 3D render of your game box
Creating a 3D render of your game box can help provide marketing material even if you already have a sample. There are many benefits to having a 3D render including: creating optimal lighting conditions, saving the setup for later, and reducing costs when changes happen.
You will need two main things to create this render:
- An illustration of your game box
- A computer with decent graphics capability
Illustration
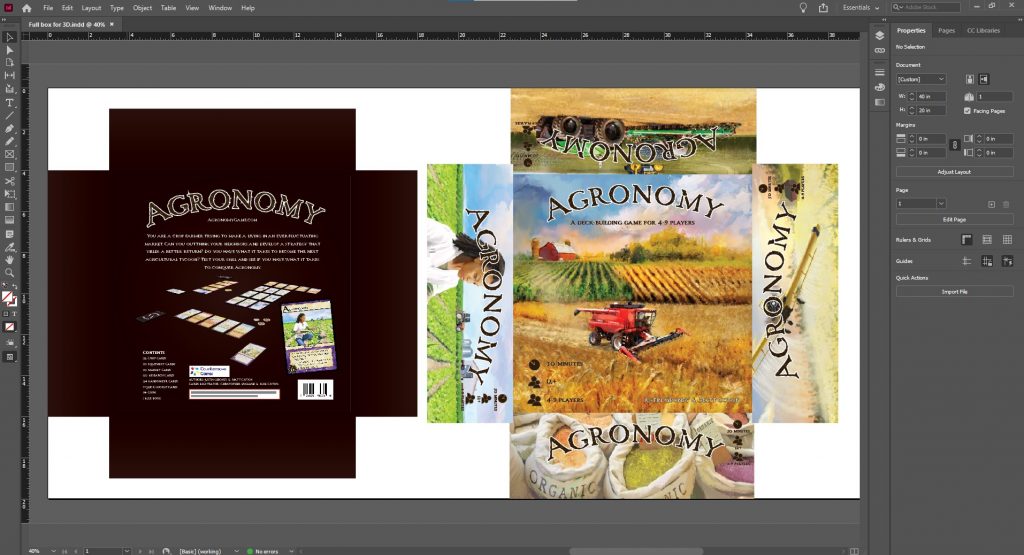
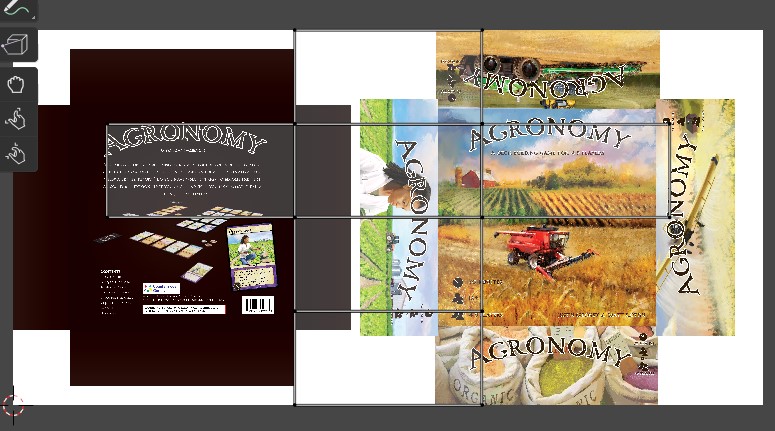
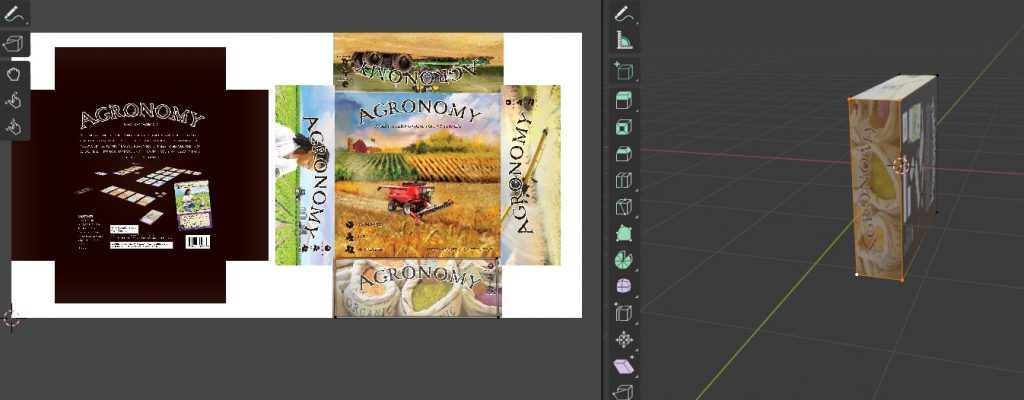
You need to start with an image of your box with the sides as flaps. In Figure 1, you will see the back (left) and front (right) of the box for Agronomy (http://agronomygame.com). This article will not go into how to create this illustration, but I used InDesign (https://www.adobe.com/products/indesign.html) for the layout. Make sure to save the illustration in a common format (I used jpg).
Blender
Download and install Blender (https://www.blender.org/). Blender is a 3D modeling tool. There are other tools such as Maya, but Blender is free. I will be using Blender 2.92.
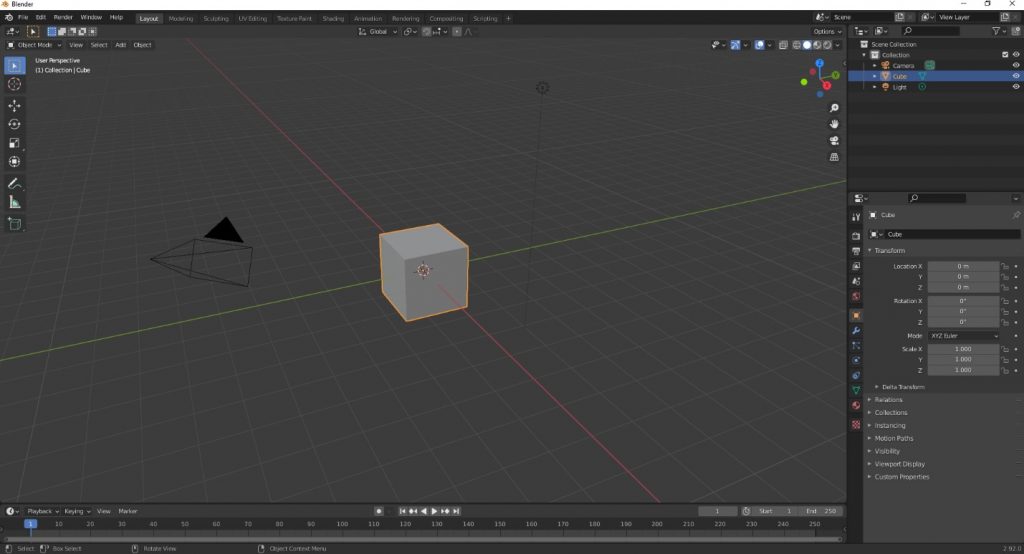
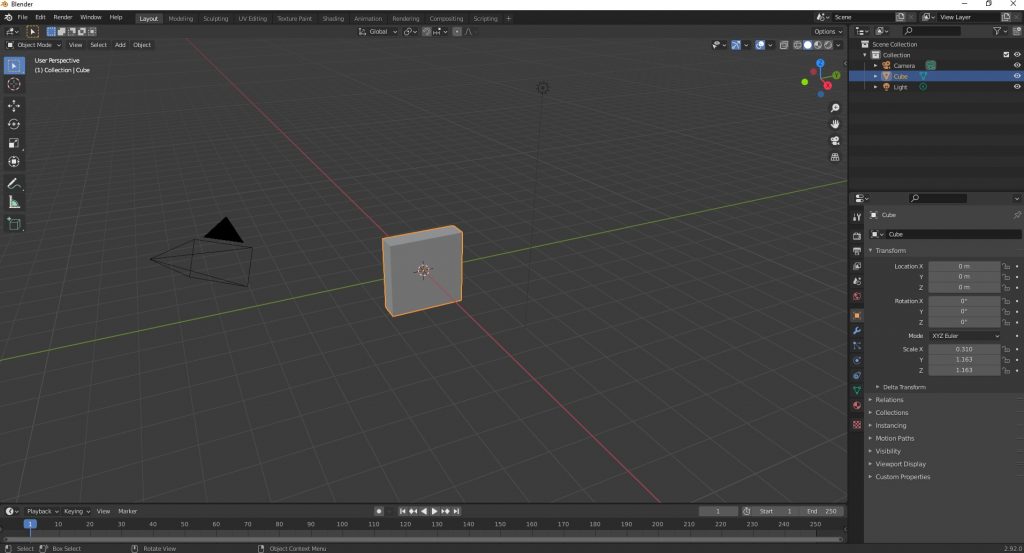
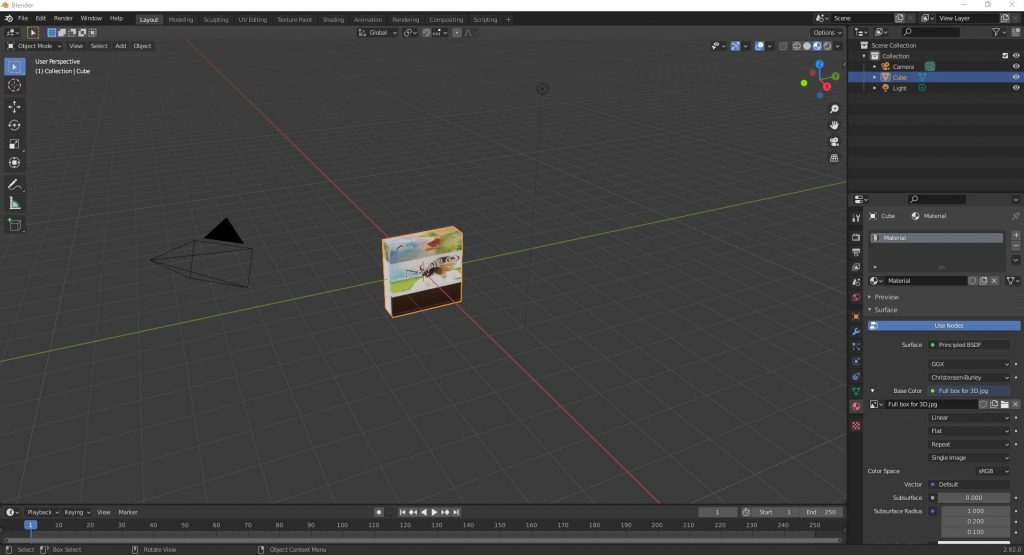
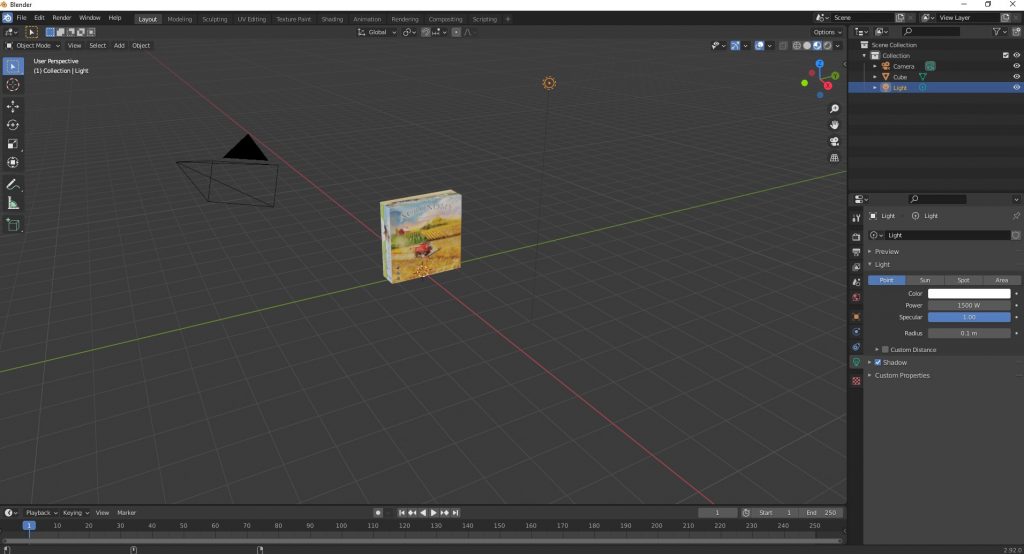
When blender starts, you will see three things in the render (Figure 2): a cube in the middle, a camera to its left (a pyramid looking object), and a light source (a circle sun looking object). The cube is going to be our game box.
Scale the cube
Make sure the cube is selected (outlined in orange) and select the orange Object Properties on the right (Figure 3).

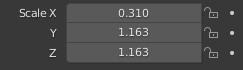
Change the scale to be the size of your box. I divided my intended box size of 11.63 inches wide by 11.63 inches tall by 3.1 inches deep by 10 giving me the following scale X = 0.310, Y = 1.163, Z = 1.163 (see Figure 4). Your box should now look like Figure 5.
Add the cover
Select the Material properties on the right side (See Figure 6).
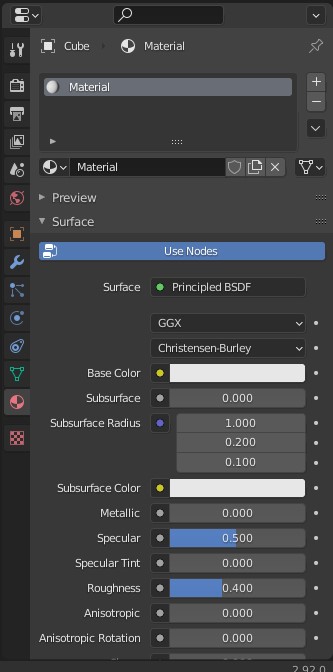
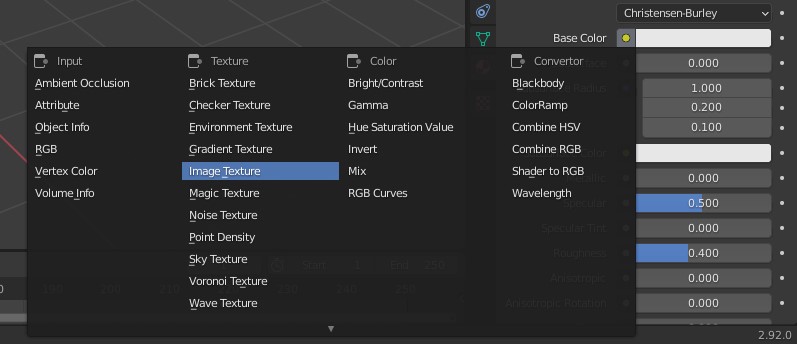
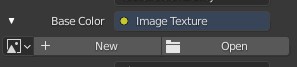
Click the yellow circle to the right of Base Color and select Image Texture (see Figure 7).
Select Open right underneath Base Color (see Figure 8). Find the illustration of the box that you created earlier.
To see the cover you just added, change your view to Viewport Shading near the top right corner of the screen (Figure 9).
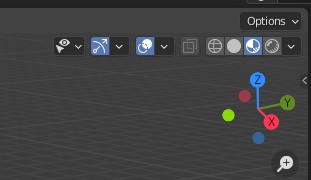
Your box will now look something like Figure 10.
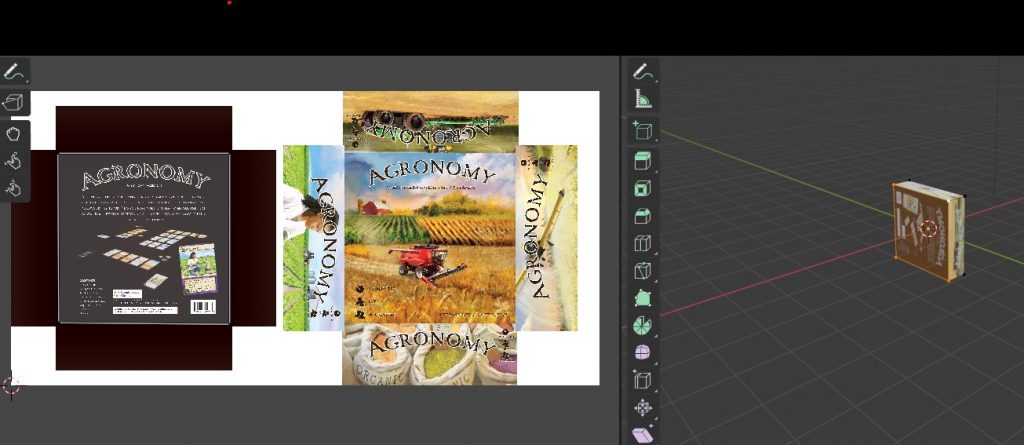
Click the UV Editing tab at the top of Blender. You will now have a split view (see Figure 11).
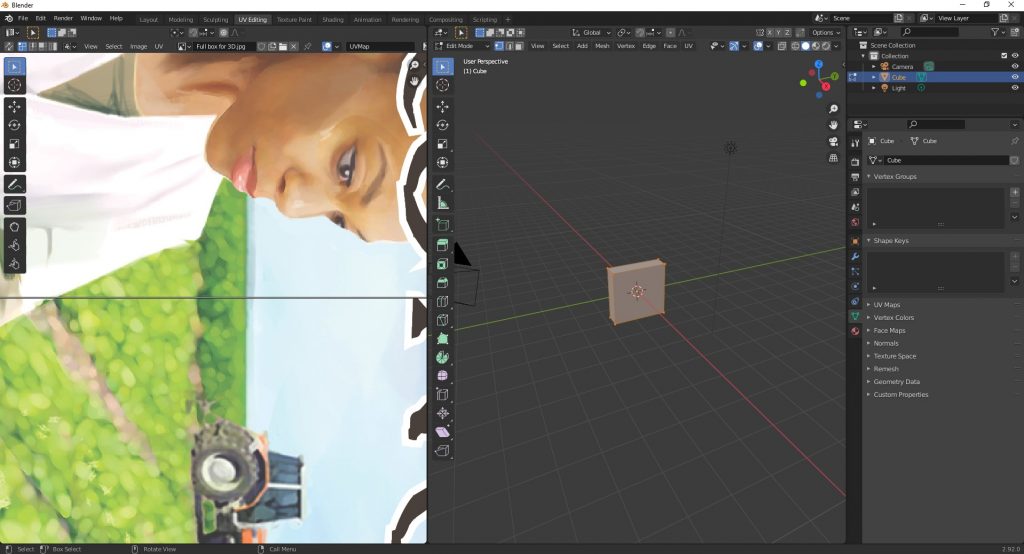
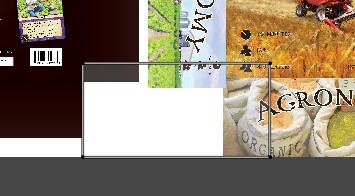
Use the mouse wheel over the box illustration to zoom out (Figure 12).
Select one of the points on the grid, press the ‘g’ key on your keyboard and move your mouse to the desired location and click (see Figure 13). Do this for the top, left, and right sides (see figures 14-15). To see your progress, you can click the Viewport Shading view on the right panel.
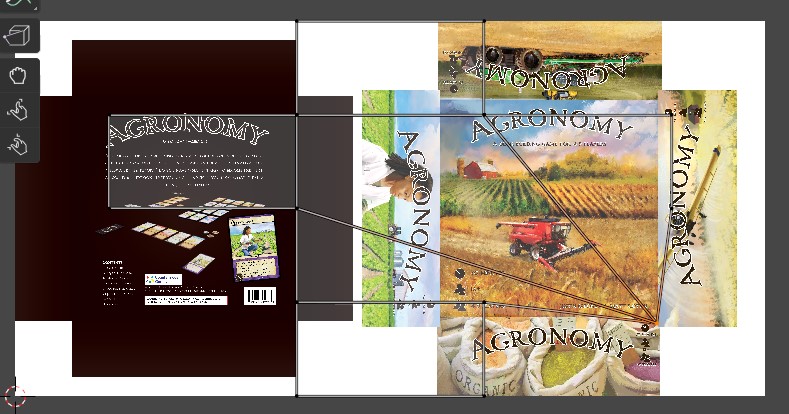
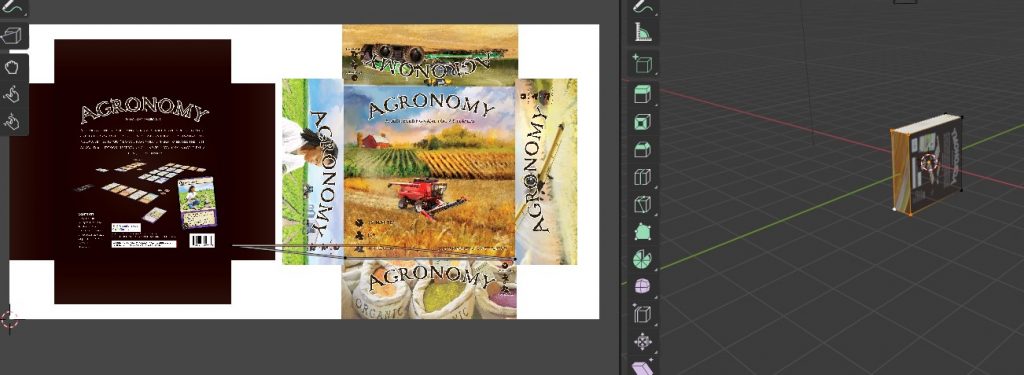
You will notice that there are still 4 points left. One is for the back. In the right view, click and hold the mouse wheel and rotate to the back of the box. Click on the four corners of the back of the box (see Figure 16). Hold shift to select multiple points. When you do this, you will notice that the selection in the left view changes (see Figure 17).
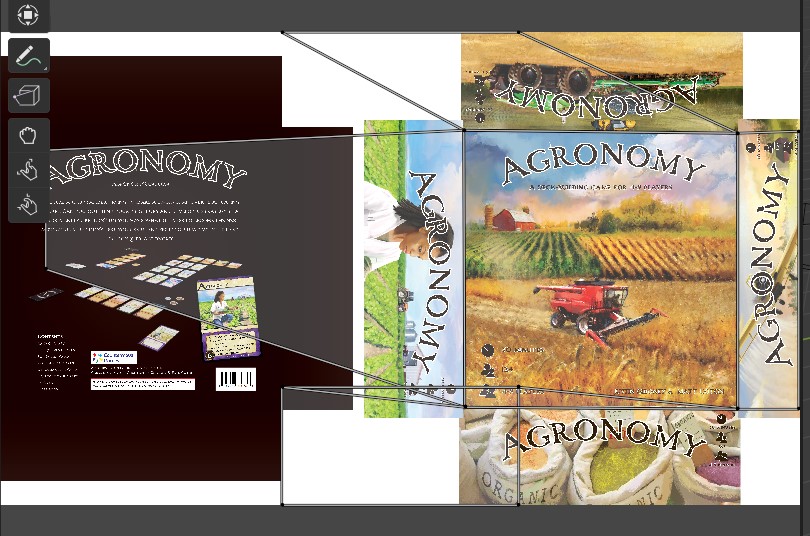
Move the corners in the left view (g key). Make it so the top of the back image is facing to the right (see Figure 18). You may need to move the corners clockwise to obtain this.
Rotate the right view (click and hold mouse wheel) so you can see the bottom side of the box (relative to how the images are facing). This panel should look stretched. Click on the dark gray background to deselect the corners. Select the corners of the bottom side.
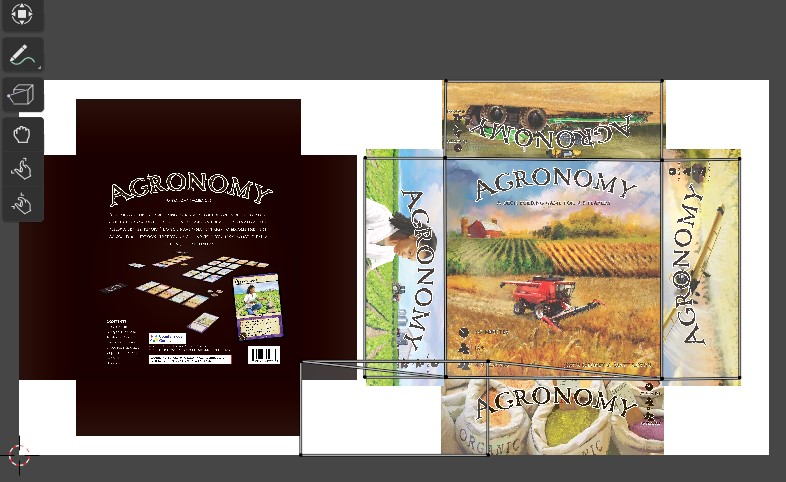
Move the corners in the left panel so the bottom side image is lined up well (see Figure 20).
Positioning
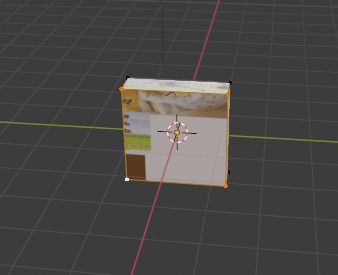
Select the Layout tab at the top of Blender. Make sure your box is selected. Select the object properties on the right. Change the Location Z to height of your box (1.163 in my case). See Figure 21 for my screen after this point.

Click on the camera. Positioning the camera will depend on the size of your box, but I am going to change the Location Z of my camera to 6.0. With the camera selected press F12 on your keyboard. This should show you the view from your camera (see Figure 22). You can close the view when you are done. Change the position of your camera so that your box is completely visible.
Final steps
The box is a little dark. Click on the light and click the green light bulb in the right panel. Change the Power to 1500 W (or any setting you feel is appropriate) (see Figure 23). This is not perfect lighting, comment if you want to see a tutorial on lighting.
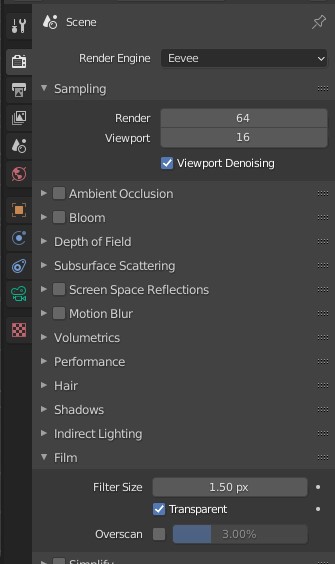
Lastly, the gray background is not ideal for most settings. We are going to make it transparent.
Click the Camera icon in the right panel (Render properties). Click the triangle next to Film. Check the Transparent box (see Figure 24).
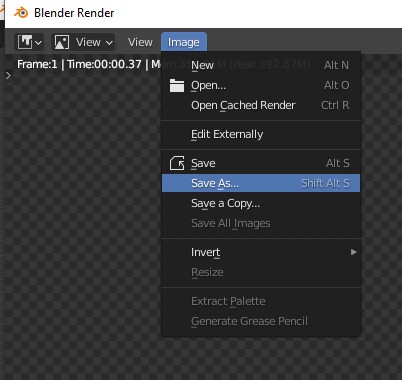
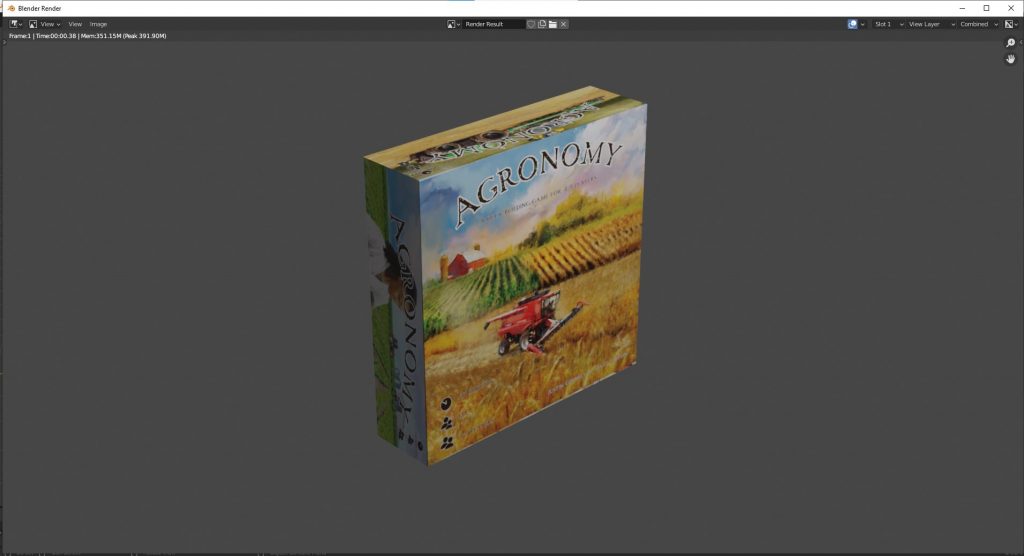
Select your camera again if it is not selected. Press F12. There should be a grid behind your box now. Save your image by selecting Image and Save As… at the top of the render.